News Center

Floor Scrubber Start-Up Procedure: Daily Pre-Op Checklist

Release Time:2026-07-31 Browse:6
Service Manual • FIG. 00

Floor Scrubber Start-Up Procedure: Daily Pre-Op Checklist

The complete daily start-up procedure for walk-behind and ride-on floor scrubbers — battery and power check, fluid levels, brush and squeegee inspection, vacuum test, and the end-of-day shutdown routine that keeps machines running.

DRAWING REF: TS-SVC-001 | REV 2026.07 | APPLIES TO WALK-BEHIND & RIDE-ON UNITS
FIG. 01

Floor Scrubber Pre-Op Checklist: Why It Matters

A daily pre-op check takes five minutes and prevents the problems that cost hours: a machine that dies mid-shift from a low battery, a run wasted on wet floors from a worn squeegee, a vacuum that stops working because a hose clogged yesterday. The daily floor scrubber pre-op checklist covers seven checkpoints in order — battery, solution tank, recovery tank, brushes, squeegee, vacuum, and drive test. Walk the checklist every morning and the machine starts clean, runs clean, and finishes clean. This guide details each checkpoint and what "pass" looks like for both walk-behind and ride-on scrubbers.
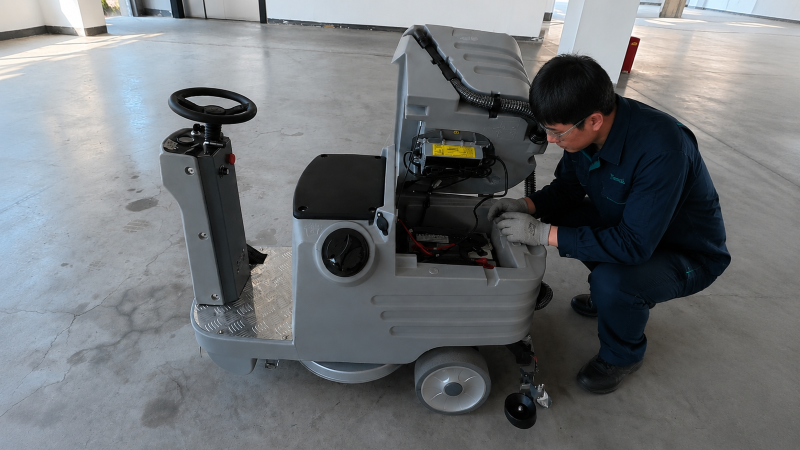
Technician performing pre-op check on floor scrubber battery compartment
FIG. 02

Floor Scrubber Start-Up Procedure: Battery and Power

  • REF 2.1Check the battery gauge — below 25% is a NO-GO for a full shift; recharge first
  • REF 2.2Inspect terminals for corrosion and loose connections
  • REF 2.3Flooded lead-acid: check distilled water level is above the plates
  • REF 2.4Ride-on only: confirm the seat safety switch is working — machine should not drive with the seat unoccupied
Annotation — Battery Lifespan

A battery that is consistently run below 20% and charged overnight develops sulfation within months. The single most effective habit is charging after every use, even for a partial shift. Lead-acid batteries last 3–5 years with this habit; lithium lasts 5–8 years and accepts partial charges without damage.

FIG. 03

Floor Scrubber Daily Checklist: Tanks and Fluid Levels

  • REF 3.1Solution tank: fill with water, add neutral pH low-foam cleaner at label ratio
  • REF 3.2Recovery tank: empty if any liquid remains from the previous day
  • REF 3.3Check the recovery tank float shut-off moves freely — a stuck float stops the vacuum
  • REF 3.4Inspect hoses at both ends for cracks, kinks, or loose clamps
Annotation — Chemical Rule

Use low-foam auto-scrubber chemicals only. High-foam products fill the recovery tank with foam, trip the float shut-off, and stop water pickup mid-run. If you see foam building up, the chemical is wrong or the concentration is too high.

FIG. 04

Floor Scrubber Pre-Inspection: Brushes and Squeegee

  • REF 4.1Brushes: check bristles are above half original length and free of wrapped debris
  • REF 4.2Dual-brush machines: replace brushes in matched pairs only
  • REF 4.3Squeegee: inspect both blades for nicks, cuts, and even wear; flip or replace if worn
  • REF 4.4Wet the squeegee blades before the first pass of the day
Annotation — Squeegee Tip

A worn squeegee is the cause of nine out of ten wet-floor complaints. Blades wear faster than most operators expect — typically every 3–6 months, sooner on rough concrete. Flip the blade to use the second edge and double the life.
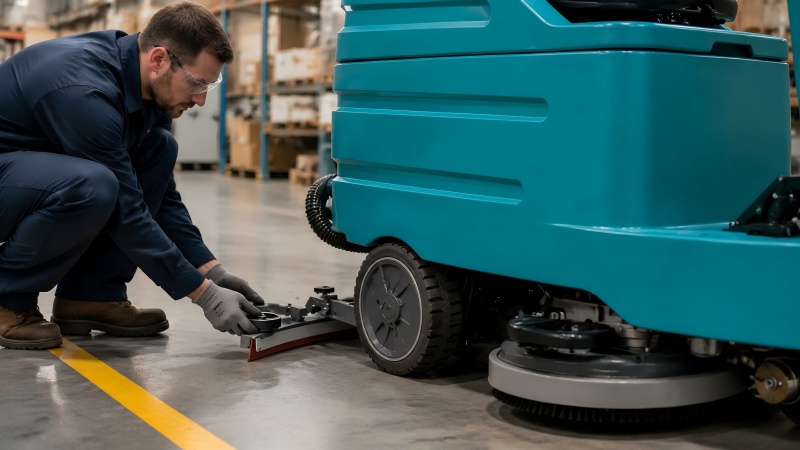
Operator inspecting floor scrubber squeegee blade before operation
FIG. 05

Floor Scrubber Daily Checklist: Vacuum and Drive Test

  • REF 5.1Vacuum test: run the vacuum and confirm suction at the squeegee connection
  • REF 5.2Check the tank lid seal is clean and the lid closes fully — a poor seal kills suction
  • REF 5.3Drive test: move the machine forward and backward in a clear area
  • REF 5.4Test the emergency stop button — it should cut power instantly
  • REF 5.5Confirm the brush deck lowers and raises smoothly

GO If All Pass

  • Battery above 25% and terminals clean
  • Solution tank filled, chemical at ratio
  • Recovery tank empty, float free
  • Brushes above half wear, matched pairs
  • Squeegee blades clean and unworn
  • Vacuum suction strong at squeegee
  • Emergency stop kills power

NO-GO If Any Fails

  • Battery below 20% before a full shift
  • Recovery tank float stuck or full
  • Squeegee blades visibly nicked or worn
  • Vacuum hose clogged or leaking
  • Emergency stop not functioning
  • Seat switch bypassed on ride-on units
Specification Plate — Daily Pre-Op Reference
  • PRE-OP DURATION:5 minutes total
  • CHECKPOINTS:7 stations in order
  • BATTERY MINIMUM:25% for full shift
  • SQUEEGEE REPLACEMENT:Every 3–6 months
  • BRUSH REPLACEMENT:Every 6–12 months
  • END-OF-DAY WRAP:10 minutes
FIG. 06

Floor Scrubber Maintenance Checklist: End-of-Day Shutdown

The pre-op check is only half the routine. The end-of-day shutdown sets up tomorrow's start-up: empty and rinse the recovery tank, empty the solution tank and flush the line, wipe the squeegee blades, remove debris from the brush hub, leave both tank lids open to dry, park with the brush deck raised, and plug the machine in to charge. Ten minutes at the end of the day means a five-minute start tomorrow — and no surprises.

Annotation — The 5-Minute Rule

Spend 5 minutes cleaning the machine after every use and it will run reliably for years. Skip it and small problems compound — a dirty squeegee blade damages the holder, which costs ten times more to replace than the blade.

Setting up a pre-op routine or buying a machine that will hold up to daily use? Donnie at TerraScrub helps facility managers standardize their floor scrubber maintenance procedures and choose machines built for daily operation. Tell Donnie your machine type and facility size for practical guidance. Reach out at Donnie@terrascrubx.com or on WhatsApp.

Get Factory-Direct Pricing

Contact Donnie for confidential pricing, spec sheets, and distributor partnership details.


Message Inquiry

*
*
*
*
验证码
*
Submit