
News Center

How to Operate a Walk-Behind Floor Scrubber: Step-by-Step

Release Time:2026-07-31 Browse:7
Operator's Handbook

How to Operate a Walk-Behind Floor Scrubber: Step-by-Step

A complete operator's guide to running a walk-behind floor scrubber — pre-use inspection, tank filling, brush and squeegee setup, proper scrubbing technique, daily maintenance, and the mistakes that shorten machine life.

Operating a walk-behind floor scrubber comes down to seven repeatable steps: inspect the machine before use, fill the solution tank with the right cleaner-to-water ratio, mount the correct brush for your floor type, adjust the squeegee height so the blade seals against the floor, scrub at a steady walking pace with overlapping passes, empty and rinse both tanks when finished, and charge the battery with the machine stored properly. Get these seven steps right and the machine will clean effectively, dry floors in 3–5 minutes, and run reliably for years. This guide walks through each step with the practical details operators learn on the job.
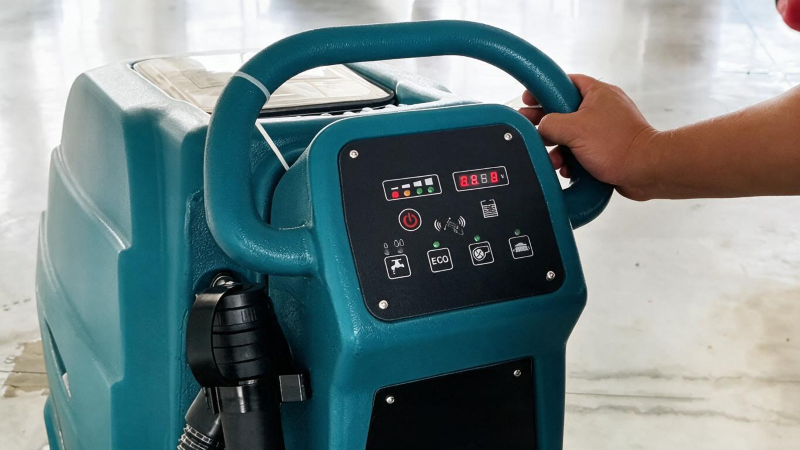

Operator hands on walk-behind floor scrubber handle and control panel
PROC 01

Pre-Use Inspection: A 3-Minute Habit That Prevents Downtime

  • Check the battery gauge — charge the machine before starting if below 25%.
  • Inspect squeegee blades for nicks, cuts, or uneven wear; replace damaged blades before cleaning.
  • Check the brush for string, wire, or debris wrapped around the hub — a wrapped brush can burn out the drive motor.
  • Verify the vacuum hose is connected at both ends and free of clogs.
  • Confirm both tanks are empty and the recovery tank float moves freely.
Skip This and...

A damaged squeegee wastes an entire cleaning run — the machine leaves streaks and wet spots, and you only notice when the floor has already dried. The 3-minute inspection costs less time than re-cleaning one aisle.

PROC 02

Filling the Solution Tank: Water, Chemical, and Ratios

  • Fill the tank with lukewarm water first — never pour chemical in before water.
  • Add neutral pH floor cleaner at the dilution ratio stated on the product label.
  • Use low-foam auto-scrubber chemicals only — high-foam products trigger the recovery tank float and stop the vacuum.
  • Set the solution flow dial to the lowest effective setting; start low and increase only if the floor is not getting clean.
Pro Tip

Too much chemical leaves a sticky residue that attracts dust and dulls the floor. Most operators use less chemical than they think they need. A neutral pH cleaner at 1:128 dilution covers most daily cleaning.

PROC 03

Walk Behind Scrubber How to Use: Mounting the Right Brush

Match the brush to your floor surface. Soft brushes (white or red pad) for sealed concrete, VCT, tile, and polished floors. Medium brushes for general-purpose cleaning on most commercial surfaces. Hard brushes for unsealed concrete, garage floors, and heavily soiled industrial surfaces. Most walk-behind machines have a quick-release brush hub — align the lugs, lift the brush onto the hub, and rotate until it locks. Change time is under one minute with practice.

PROC 04

Squeegee Setup: The Key to Dry Floors

  • Lower the squeegee assembly until the blades contact the floor along the full width.
  • Check the rear blade angle — it should deflect slightly backward to create the suction seal.
  • Adjust the front blade so it sits flat with a small gap; the suction pulls water under the blade.
  • Wet the blades before the first pass — a dry blade can squeak and skip.
Common Sign of Bad Setup

If the machine leaves a trail of water behind the squeegee, the blades are too high, worn, or the vacuum hose is clogged. Fix the squeegee first — it is the cause of nine out of ten wet floor complaints.

PROC 05

Floor Scrubber Operating Technique: Speed, Overlap, and Direction

Walk at a steady pace — roughly 2–3 mph, about the speed of a normal brisk walk. Moving faster than that leaves dirty streaks because the brush does not have enough contact time. Overlap each pass by 4–6 inches to avoid leaving a visible stripe at the edge of the cleaning path. Clean in straight lines, starting at the far end of the area and working back toward the drain or exit so you are never walking through cleaned floor. When you reach the end of a pass, raise the squeegee before turning — dragging it while turning smears water sideways and can bend the blade.

Turning Tip

Raise the brush deck and squeegee together before any turn, reposition, or when crossing floor thresholds. This simple habit prevents the most common squeegee damage — bent blades from lateral drag.

Experienced operator training new employee on floor scrubber technique
PROC 06

End-of-Shift Cleanup: Empty, Rinse, Dry

  • Empty the recovery tank and rinse it with fresh water — never let dirty water sit overnight.
  • Empty the solution tank and flush the line with clean water.
  • Wipe down the squeegee blades and check for debris wrapped around them.
  • Clean the brush hub and remove any wrapped string or wire.
  • Leave both tank lids open so the interior dries fully — prevents mold and odor.
  • Store the machine in a dry area with the brush deck raised off the floor.
Why This Matters

A recovery tank left full for 24 hours develops bacteria and odor that transfers onto the next day's floors. In warm months the smell can appear in under 12 hours. The end-of-shift rinse takes 5 minutes and prevents a problem that takes hours to fix.

PROC 07

Charging and Battery Care

  • Charge after every use — never leave a lead-acid battery partially discharged overnight.
  • Charge in a well-ventilated area; lead-acid batteries emit hydrogen gas during charging.
  • Check distilled water levels weekly on flooded lead-acid batteries; add after charging, not before.
  • Keep terminals clean and tight — corroded terminals cause slow charging and reduced runtime.
Battery Life Expectancy

Flooded lead-acid batteries typically last 3–5 years with proper care. AGM lasts 4–5 years maintenance-free. Lithium lasts 5–8 years and charges in 1–2 hours. The charging habit — charge after every use — is the single biggest factor in battery lifespan.

Floor Scrubber Operator Training: Do's and Don'ts

Do

  • Sweep or dust mop before scrubbing
  • Pre-wet squeegee blades before the first pass
  • Use the lowest effective solution flow
  • Overlap passes by 4–6 inches
  • Empty tanks after every shift
  • Charge the battery after every use

Don't

  • Scrub over loose debris, cords, or cables
  • Drag the squeegee while turning
  • Use high-foam cleaning chemicals
  • Run the machine with a full recovery tank
  • Let dirty water sit overnight
  • Store with the brush deck down

Quick Reference — Common Settings

  • Walk speed: 2–3 mph (normal brisk pace)
  • Pass overlap: 4–6 inches
  • Chemical dilution: neutral pH at label ratio (often 1:128)
  • Solution flow: lowest effective setting
  • Floor dry time: 3–5 minutes with good squeegee setup
  • End-of-shift cleanup: 5–7 minutes

Training a new operator or choosing your first walk-behind scrubber? Donnie at TerraScrub walks facility managers through machine selection and operator training every week. Tell Donnie your facility size, floor type, and how many operators you need to train for practical guidance. Reach out at Donnie@terrascrubx.com or on WhatsApp.

Get Factory-Direct Pricing

Contact Donnie for confidential pricing, spec sheets, and distributor partnership details.


Message Inquiry

*
*
*
*
验证码
*
Submit